grid 650 review

The grid 650 is quite possibly one of the most ambitious keyboard projects from 2020. Apart from its unique visual design, it incorporates Bluetooth capabilities, a hybrid mounting style, and a modular top piece for accessories. I spent a little over a month living with the keyboard to find out if the designers bit off more than they could chew (or if they were successful in their design)!
Specs
Form factor – 65% WK or WKL (65-70 keys)
Construction – gasket-mount (silicone tabs + burger-mount), plateless-mount
Case – CNC 6061 aluminum with anodized and/or electrophoresis finish
PCB – solder or hotswap (south-facing, 5-pin), USB-C and hub via daughterboard, VIA/QMK support, Bluetooth (optional)
Plate – plateless, 1.5mm, or 4mm aluminum (included); polycarbonate (purchased separately)
Stabilizers – PCB-mount (not included)
Pricing – $365-490+ (depending on options)
Availability – group buy in December 2020 (ended)
Disclaimer – I received the grid 650 from the keyboard’s designers for review. I have no financial arrangement with them, and all opinions are my own. A big thank you goes to my friend Sanjeev for lending me his GMK Bingsu set to use in the photos.

Introduction
The grid 650 was introduced in November 2020 as an interest check on geekhack and KeebTalk. The unlimited group buy ran from December 2020 to January 2021 on zFrontier.
This 65% keyboard came as an ambitious follow-up to the grid 600, a design from July 2018 (which ran as a group buy in August 2018). Both feature interchangeable modules, but that’s where the similarities end. Whereas the grid 600 was merely a chassis for generic tray-mount PCBs, the grid 650 is a keyboard completely redesigned from the ground up.
The latest offering from grid adds Bluetooth functionality, new modules, and an entirely new mounting system. Buyers were able to pick from a myriad of options at checkout - plateless or gasket, 1.5mm or 4mm plate, Bluetooth/wired or wired only, hotswap or solder PCB, and WK or WKL top. On top of this, there were three chassis colors and nine different top modules in seven different colors. The functionality of the modules ranged from an LED strip, to an LCD screen, to a volume knob. The possibilities for customizing a grid 650 were plentiful to say the least.
Pricing began at $365 for a plateless build with wired PCB - upgrading to a BLE PCB added $15 to the bill, going with a gasket/plate build added $65, and additional modules cost $35-80 (depending on the complexity of the module). There was no upcharge to go with a hotswap PCB. Additional 1.5mm or 4mm plates cost $65, extra wired PCBs cost $55, and extra BLE PCBs cost $70. Essentially, this meant that the most expensive grid 650 configuration would run you $490 – before extra modules and components.
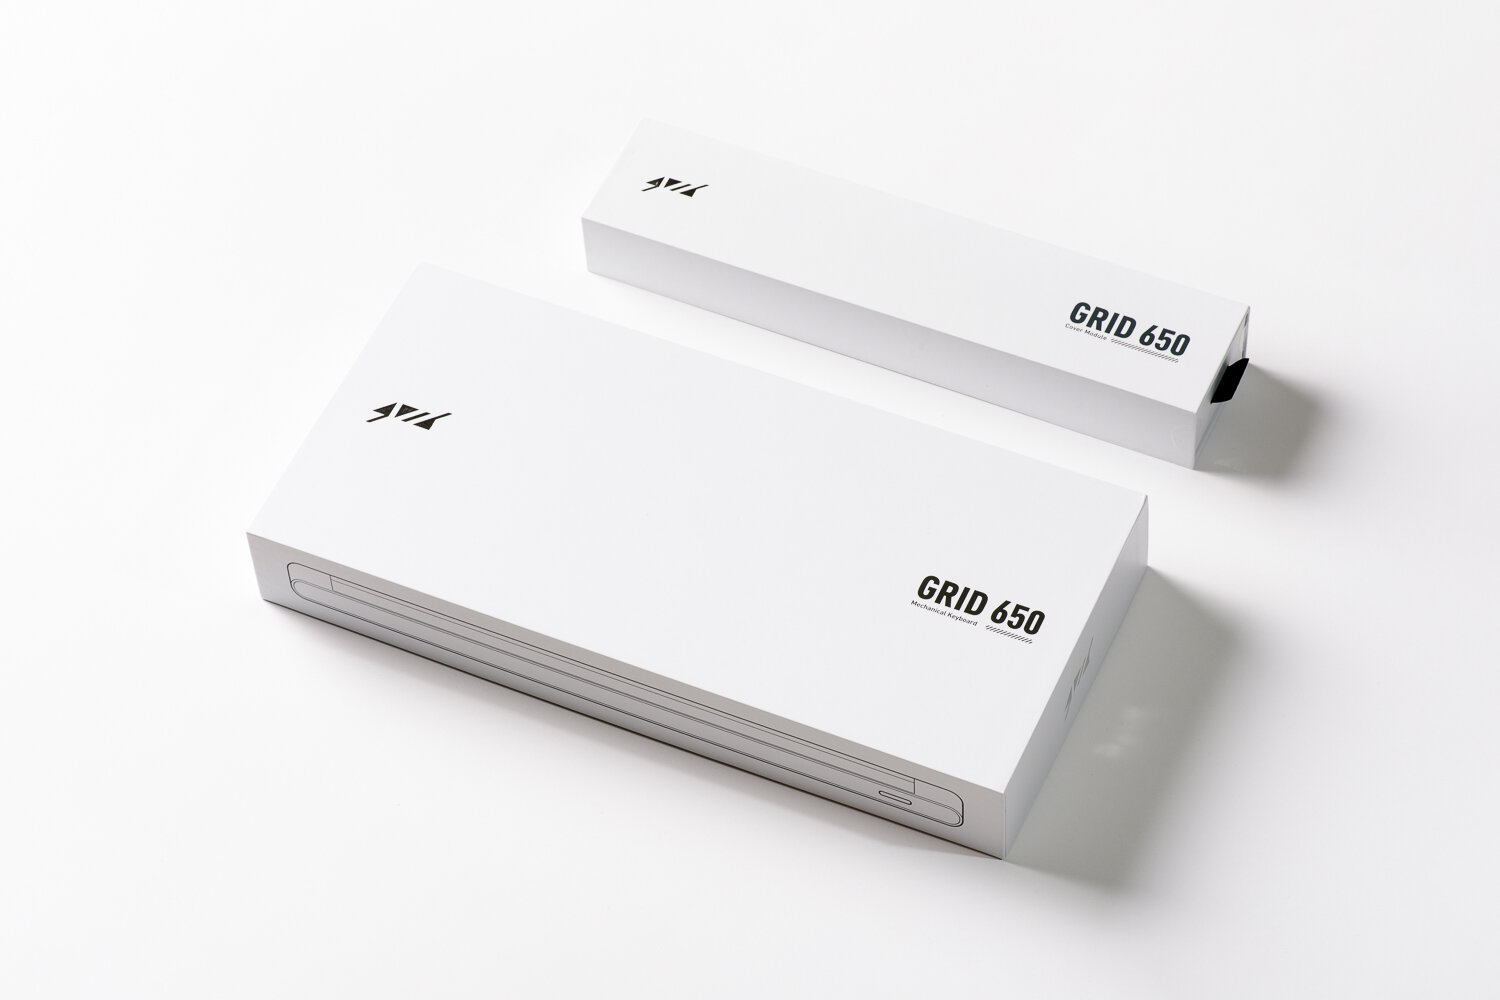
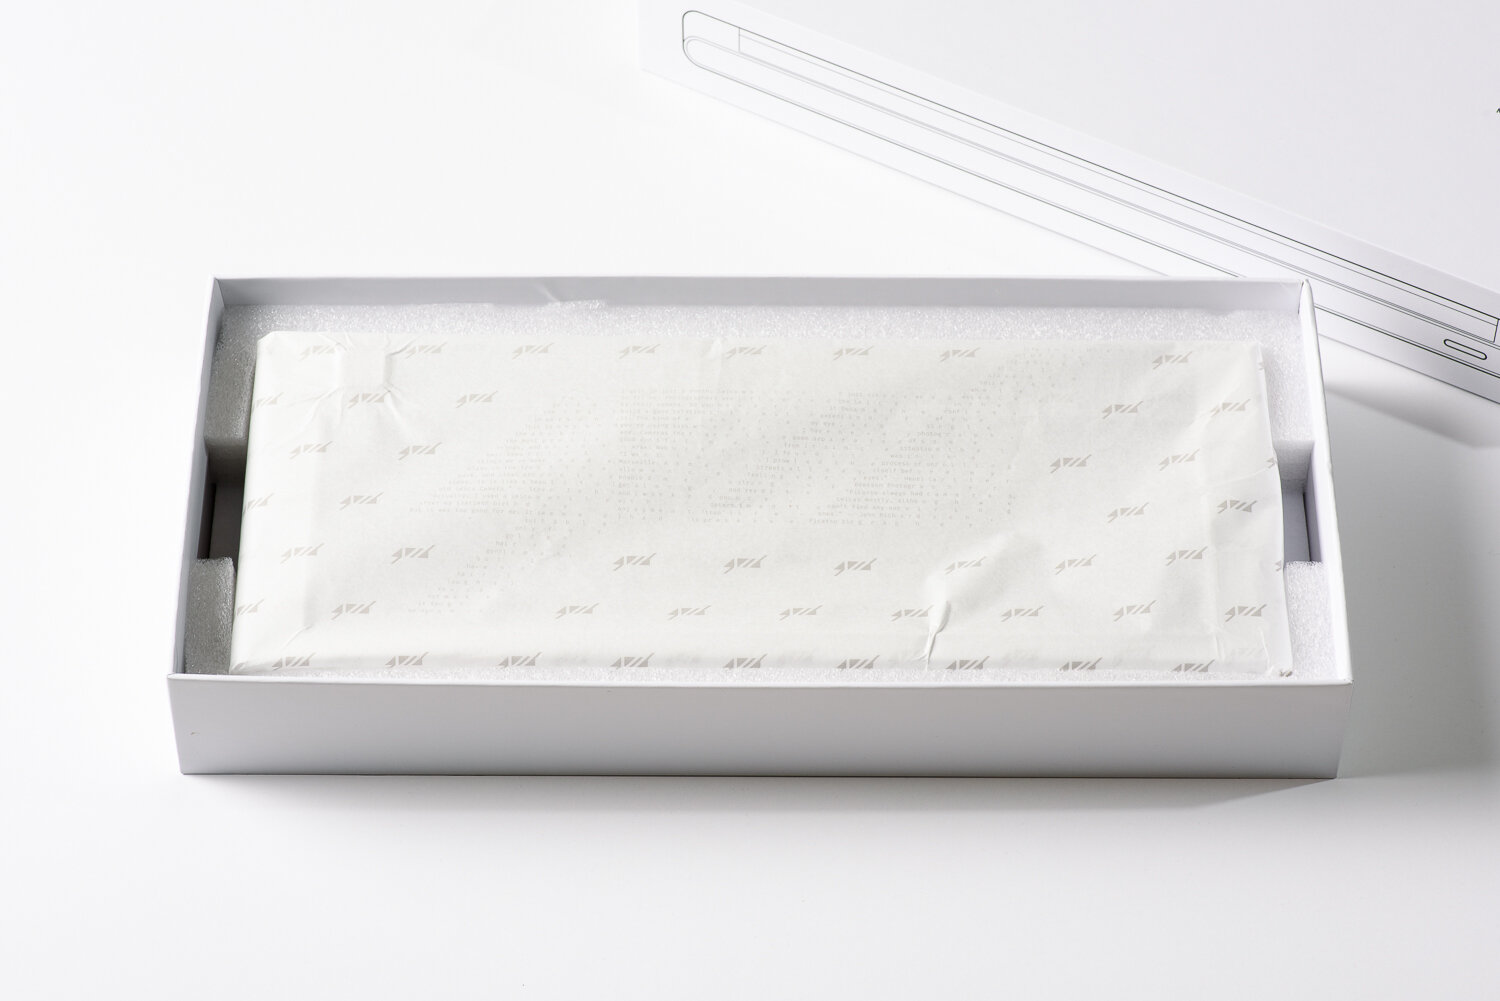
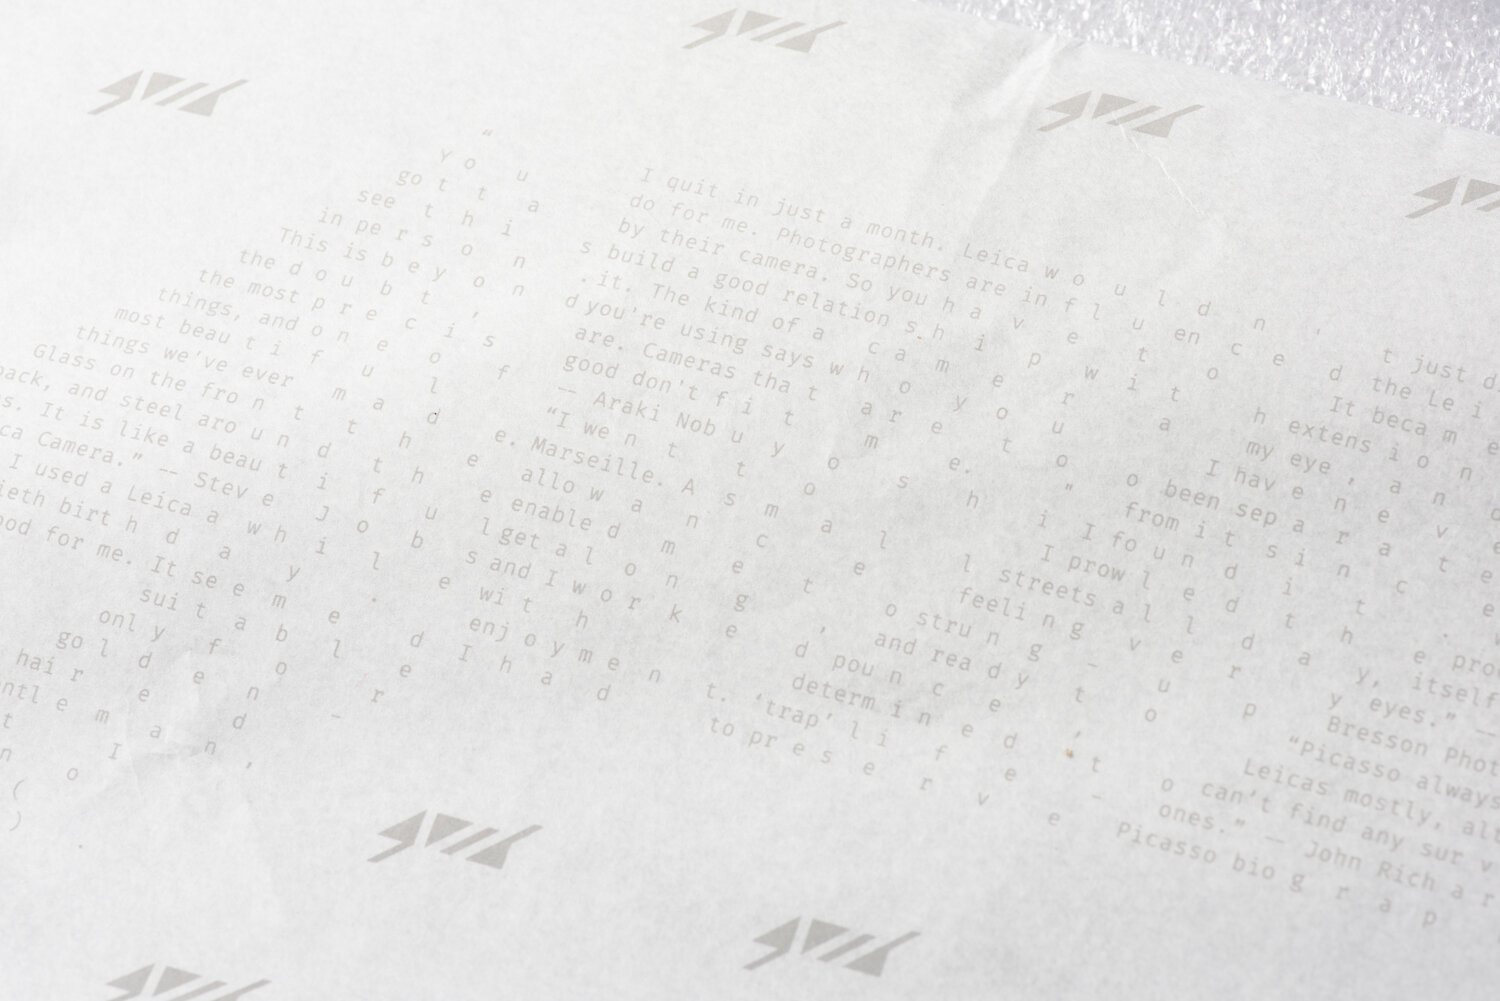
The grid 650 comes in a white box with custom foil branding. The keyboard is wrapped in custom tissue paper with a word cloud of the grid logo printed on it composed of various quotes about Leica cameras. I found this choice to be a bit peculiar, but I suppose it alludes to some of the designer’s inspirations for the grid 650. The keyboard comes with the PCB, plate, and dampening foam installed. Underneath the keyboard is a separate ziplock for the additional gaskets and spare PCB cables. If you ordered additional modules in the group buy, they will ship in separate long white boxes (somewhat reminiscent of Apple Watch accessory packaging). Overall, the packaging is decent, but it would’ve been nice to see an included storage case or hex keys for assembly at this price point.
Design and Construction
In terms of the internal construction of the grid 650, there is quite a bit to unpack. The mounting system of the keyboard is officially listed as gasket-mount or plateless-mount. However, upon closer examination, you’ll find that the style of the “gasket-mount” is actually more similar to top-mount and burger-mount.

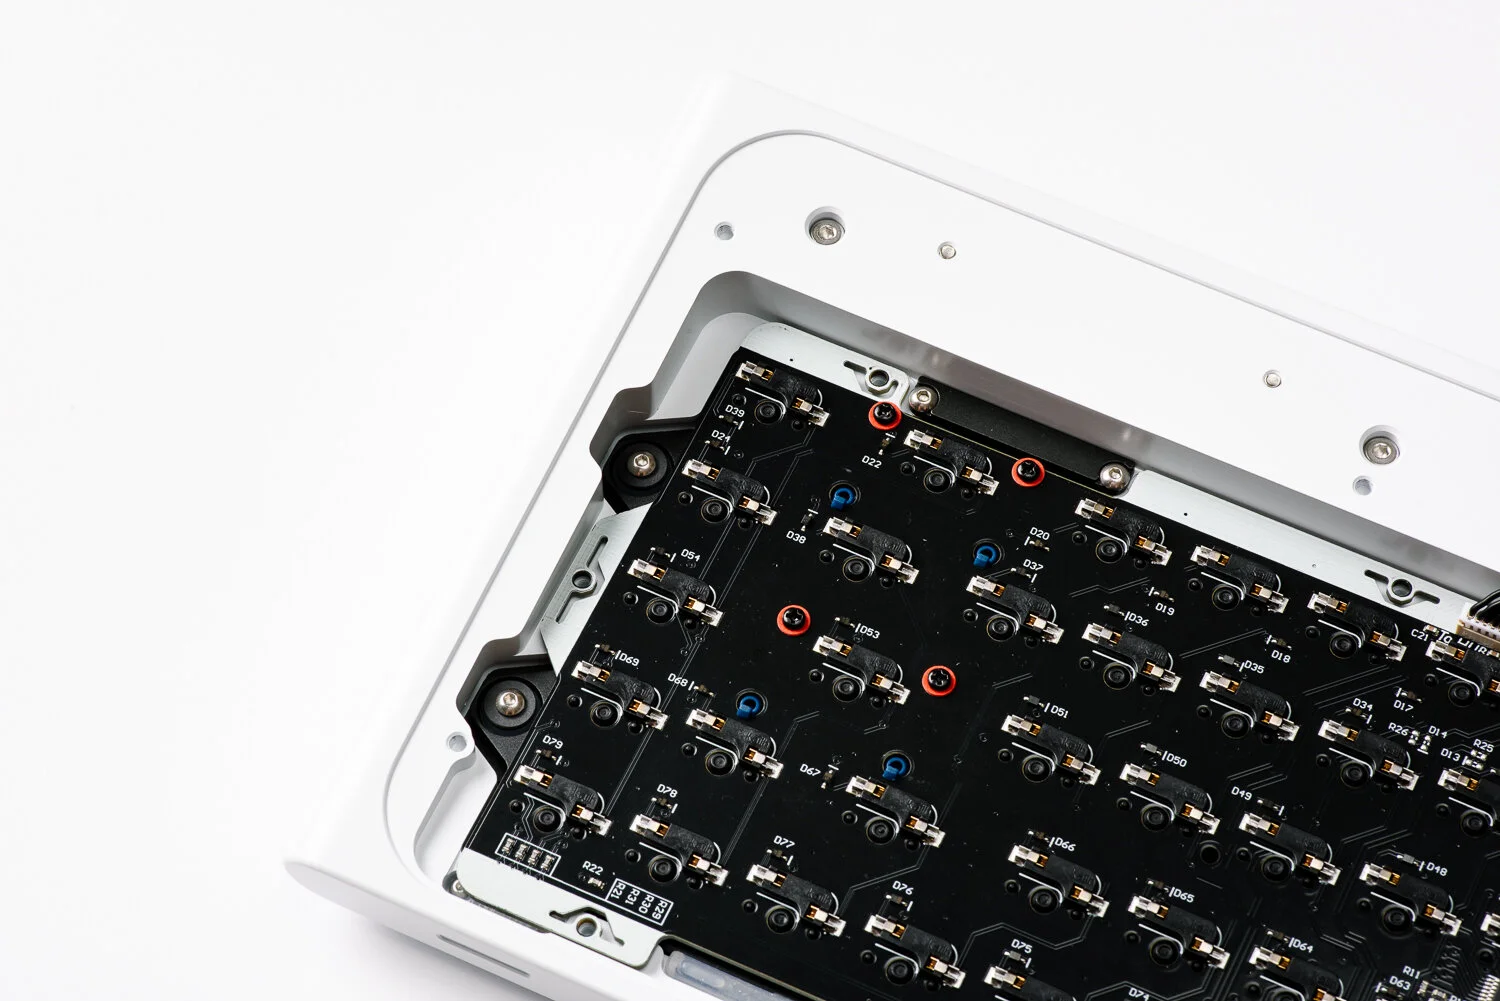
The part that can be considered “gasket-mount” involves tabs that protrude from the plate with silicone sleeves that go over them (three along the top, three along the bottom). The top three tabs require three metal brackets (each screwed in via two M2.5x3 screws) to be secured to the top case; the bottom three tabs are supported by protrusions on the bottom case. On the left and right sides of the plate are four more tabs which house a fairly intricate burger-mounting system. At each of these four tabs, an M2.5x8 screw goes into a plastic bushing that has a rubber O ring wrapped around it. Before the side tabs on the plate make contact with the top case, there is a small layer of Poron adhered to the cutout in the top case. Between the plate and PCB, you can also insert an included sheet of Poron for additional dampening (3.6mm thick for the 1.5mm plate and 1.1mm thick for the 4mm plate).
If all of this sounds over-engineered, that’s because it absolutely is. I’ll discuss the actual implications of this mounting style in the typing sound and feel section of the review.
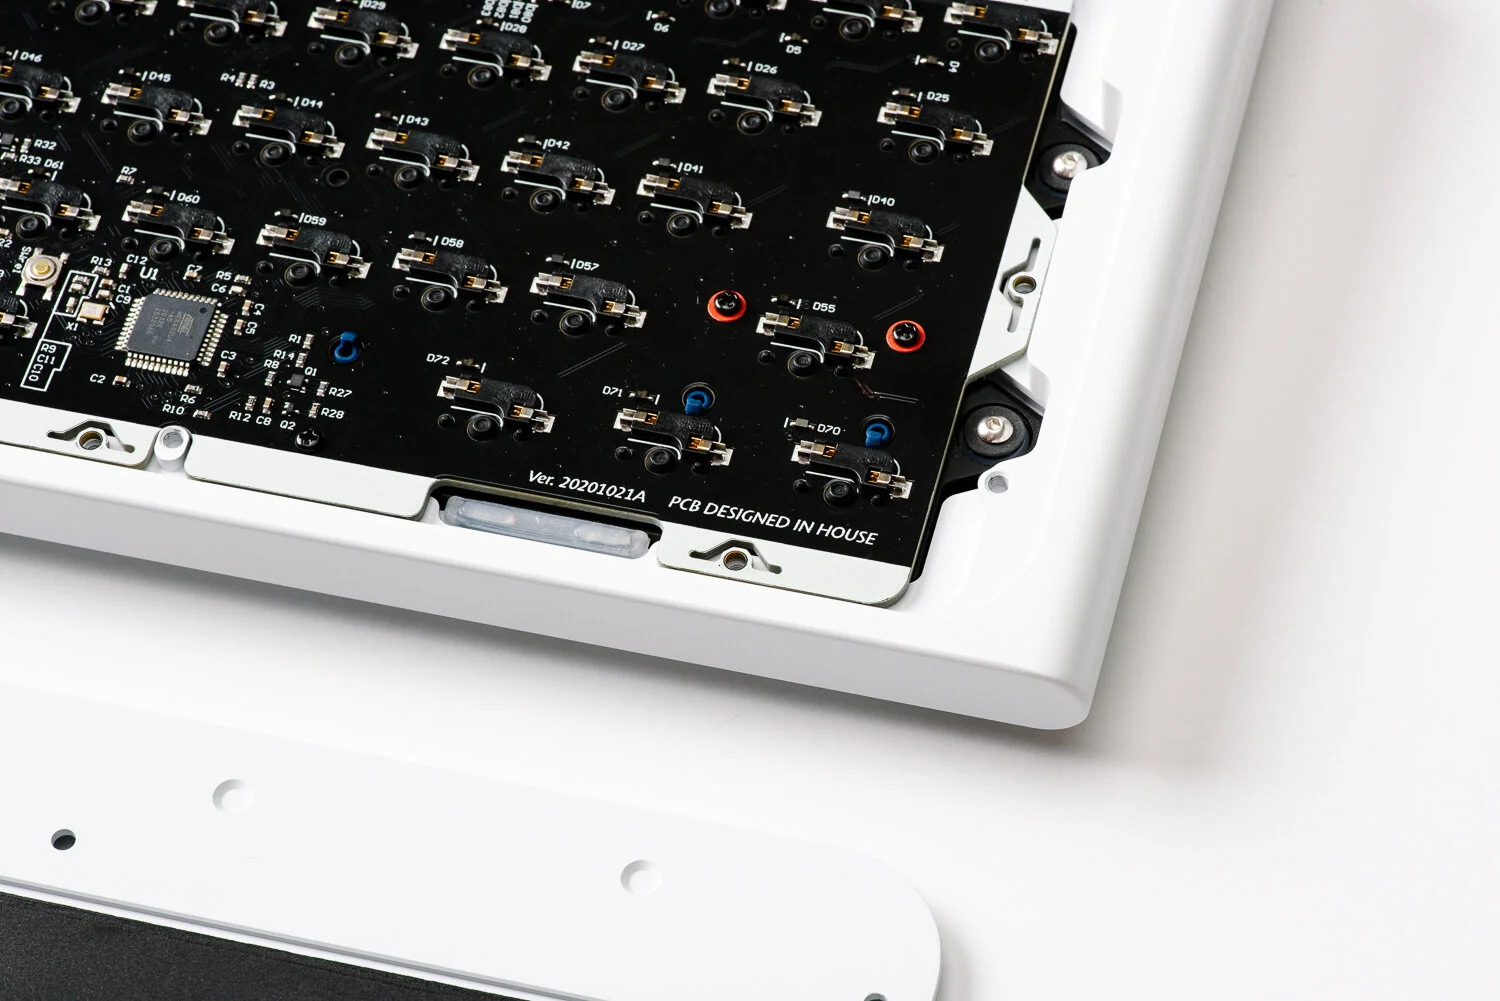
If you decide to skip the plate altogether and go with a plateless configuration, you can secure the PCB directly to the top case via ten M2.5x3 screws (four along the top, four along the bottom, and two on the sides). The PCB also features small flex cuts around each of these screw holes. I would only recommend going the plateless route if you use a solder PCB. Attempting a plateless build with a hotswap PCB makes it very easy to unseat the pins from the sockets if you happen to hit a key at an angle.

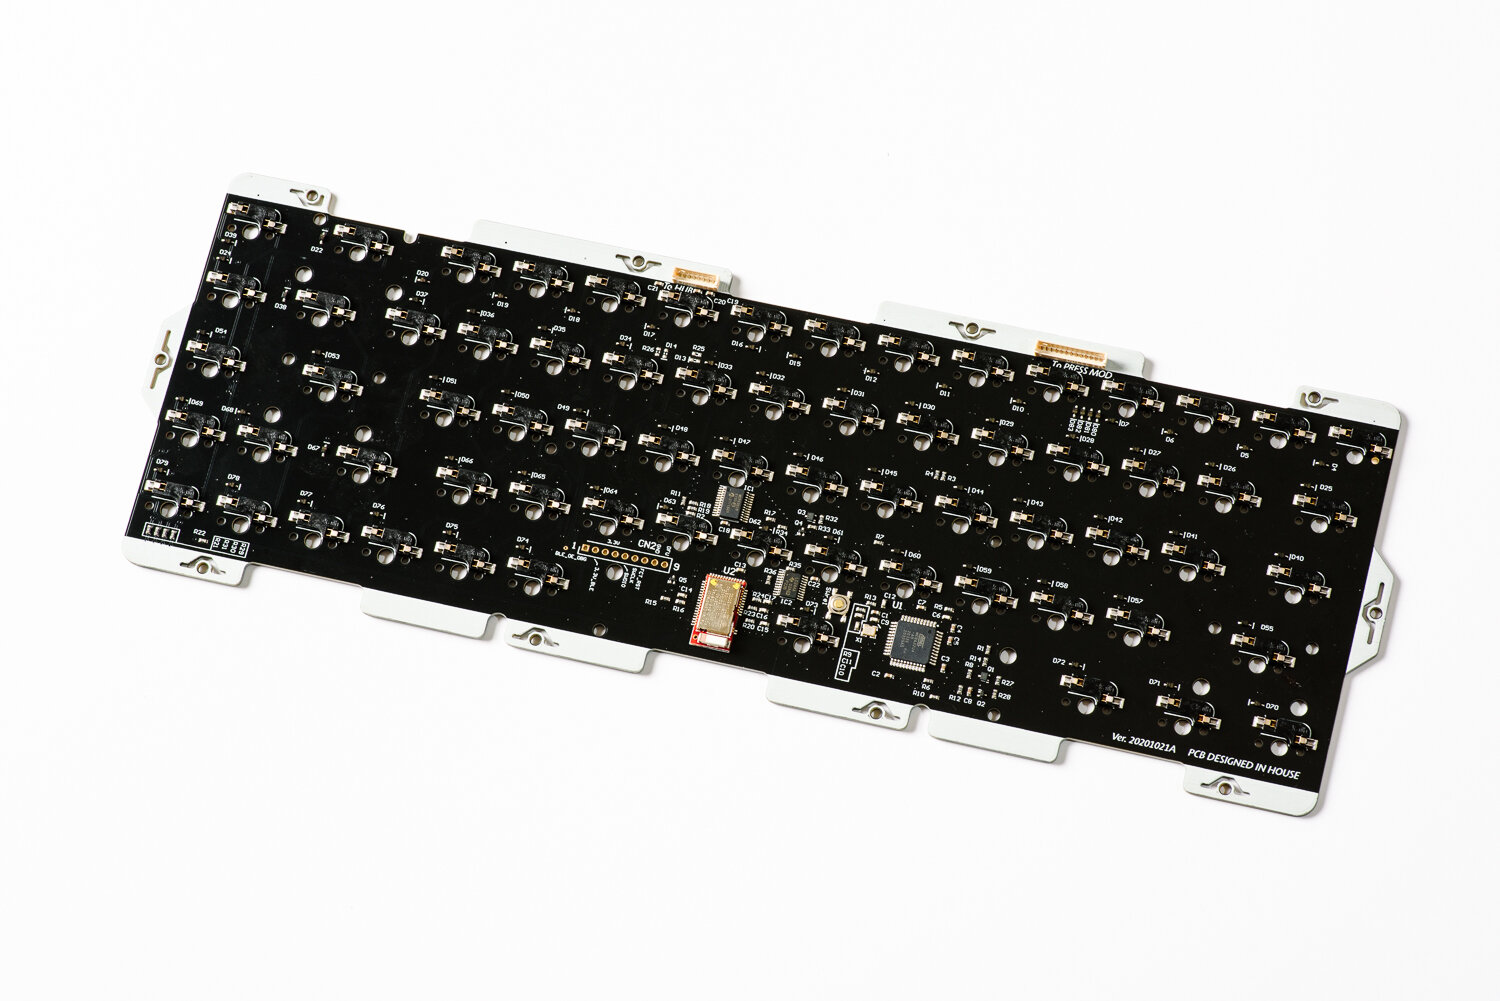
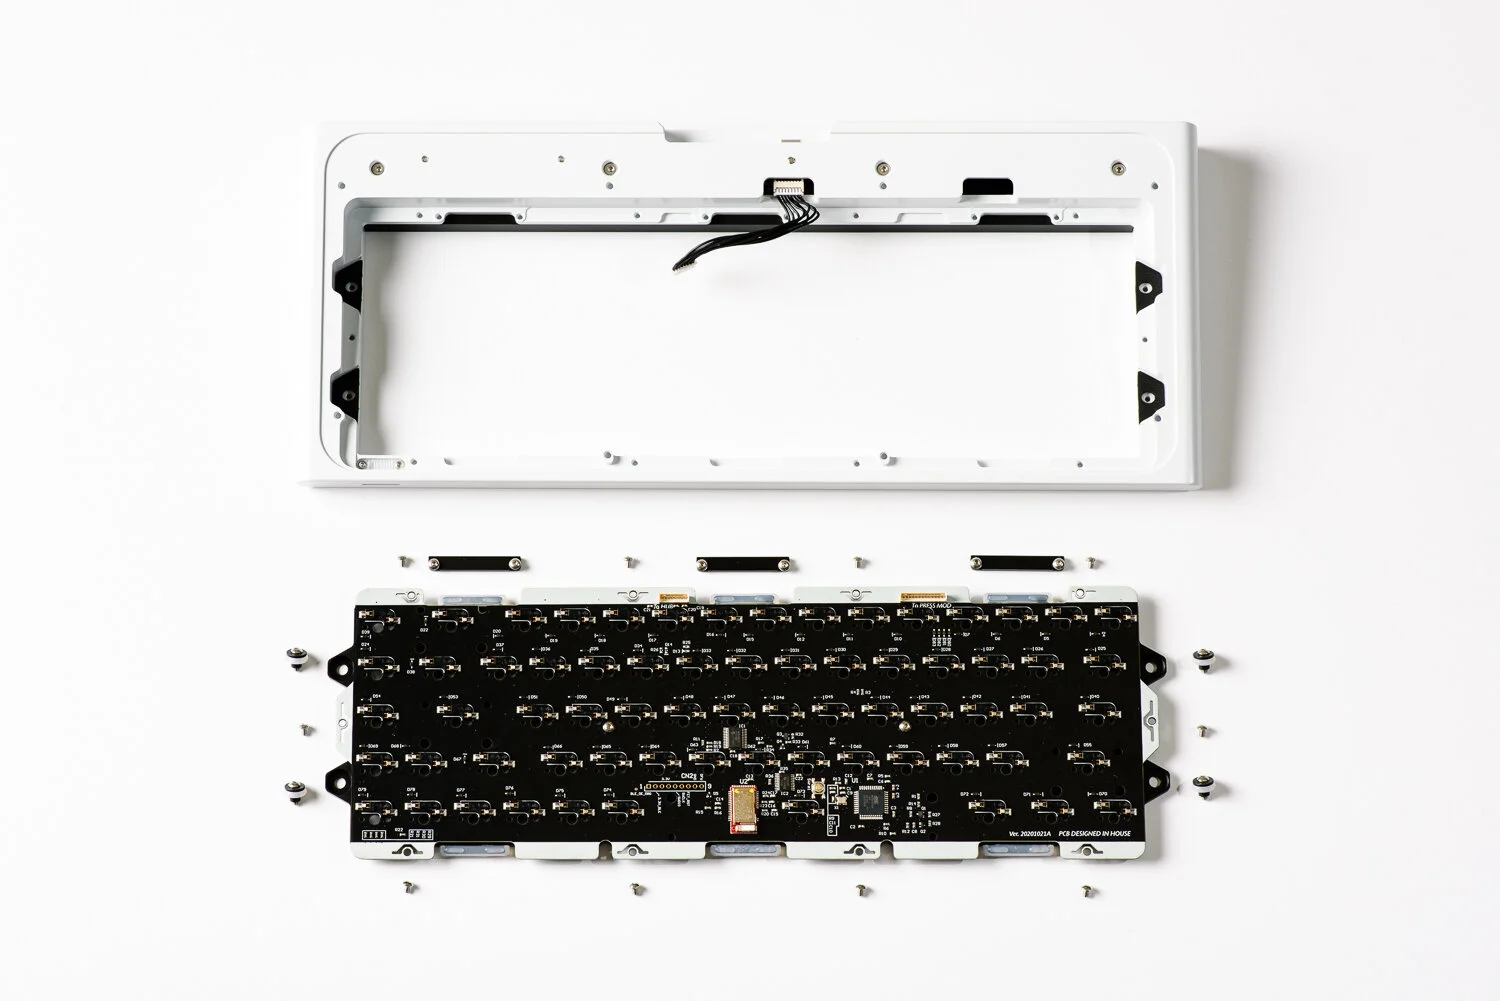
Speaking of the PCB, there are options for hotswap and soldered PCBs (both designed in-house). The hotswap variant supports 5-pin switches in the correct south-facing orientation. Each of the slots is physically labeled with the corresponding key, even on the hotswap variant. There is no RGB, which I don’t think will be a dealbreaker for most people buying this board. The grid 650 PCB supports PCB-mount stabilizers as well. For those knowledgeable about PCB components, the MCU is an ATmega32U4 and the BLE module is a Raytac MDBT40. There are no USB-C to C issues unlike with the grid 600.
The PCB connects to a daughterboard concealed in the front module portion of the case via a fairly robust feeling 8-pin JST connector. Due to the location of the daughterboard in the top case, there is no awkward maneuvering required when disconnecting the JST connector from the PCB (most daughterboards are located in the bottom case). If you opt for the Bluetooth PCB, the battery will also go in the top module portion. I will talk more about the modules in the features section of the review, but for now, all you need to know is that each of the modules is held on via four M3x12 screws that are only accessible from inside the case.
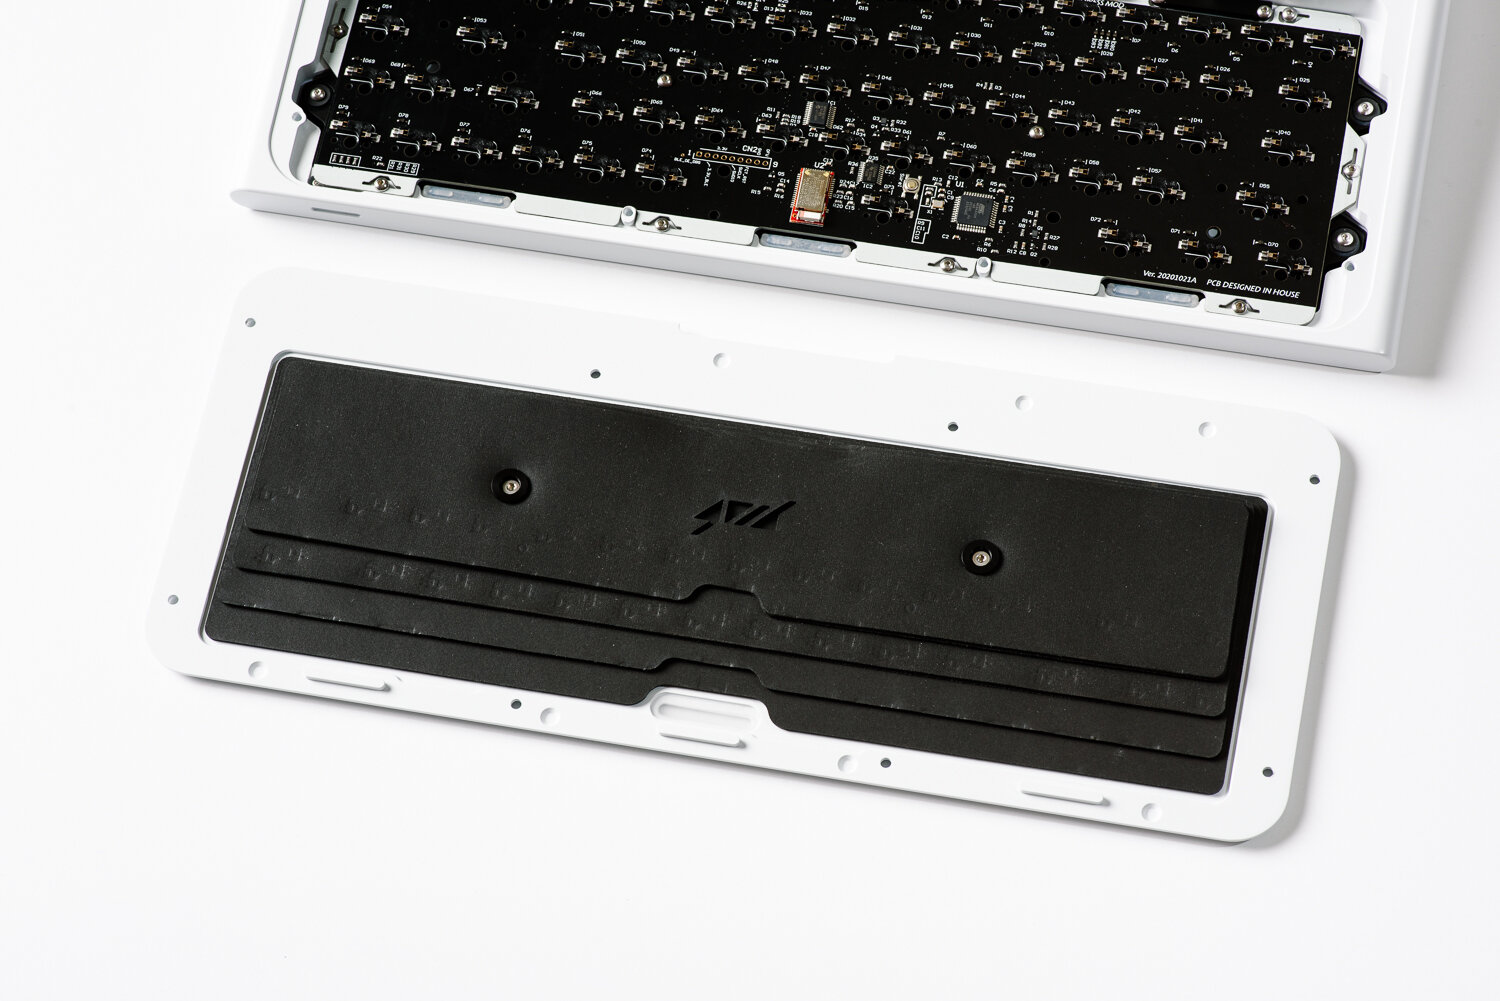
Since most of the keyboard assembly is in the top case, the grid 650 also features a mechanism to secure the included Poron foam to the bottom case. Two plastic bushings and M3 screws are used to bolt the four staggered pieces of foam (accommodating for the slant in the top case) to the interior of the bottom case. To close up the keyboard, the bottom case is attached via eight M3x4 screws (four along the top, four along the bottom)..
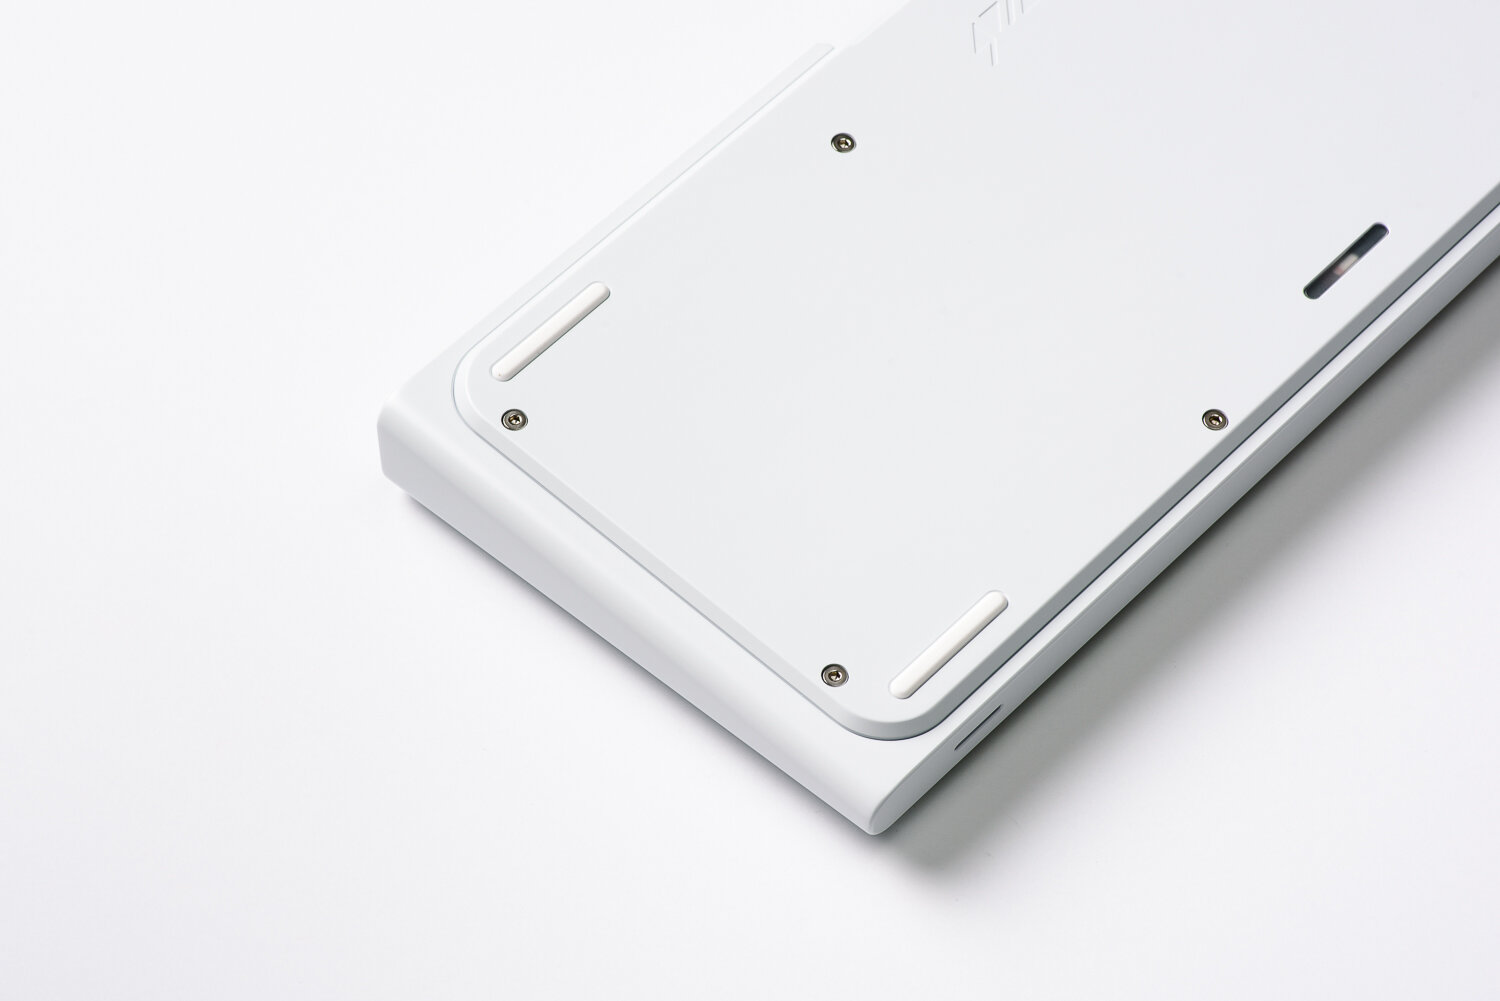
The feet come pre-applied in the form of rubberized strips in all four corners. These integrated feet feel substantially more premium than the common 3M Bumpons and are even a bit nicer than the more modern long rubber strip feet. Functionally, they are also excellent at keeping the keyboard in place on the desk.
The grid 650 measures 21mm in the front, 34mm in the back, 355mm wide, and 145mm deep. The typing angle is 5.5 degrees. Fully built, the keyboard weighs approximately 4 lbs - give or take a few oz, depending on your choice of battery, module, plate, etc. The keyboard definitely feels substantial for a 65%, and I’m fairly certain most people won’t be using this as a travel option.

Aesthetics and Details
A couple of things stand out right away with the grid 650’s appearance - large bezels, curvy sides, and an overall seamless look. There is a certain retrofuturism to the design, and the keyboard feels like it could be a distant cousin to the likes of the IBM Model F.
Whereas most keyboards feature a distinct top and bottom case that come together, the grid 650 incorporates a unibody chassis in its design. I know I mentioned a top case and bottom case in the previous section of the review, but calling the chassis a top case doesn’t actually do it justice. The majority of the keyboard is milled out of a massive chunk of aluminum and the bottom case is just a thin cover to close up the cavity in the keyboard. Undoubtedly, the amount of machining work here must be extensive, factoring in the internal complexities of the mounting system and the various external curves.

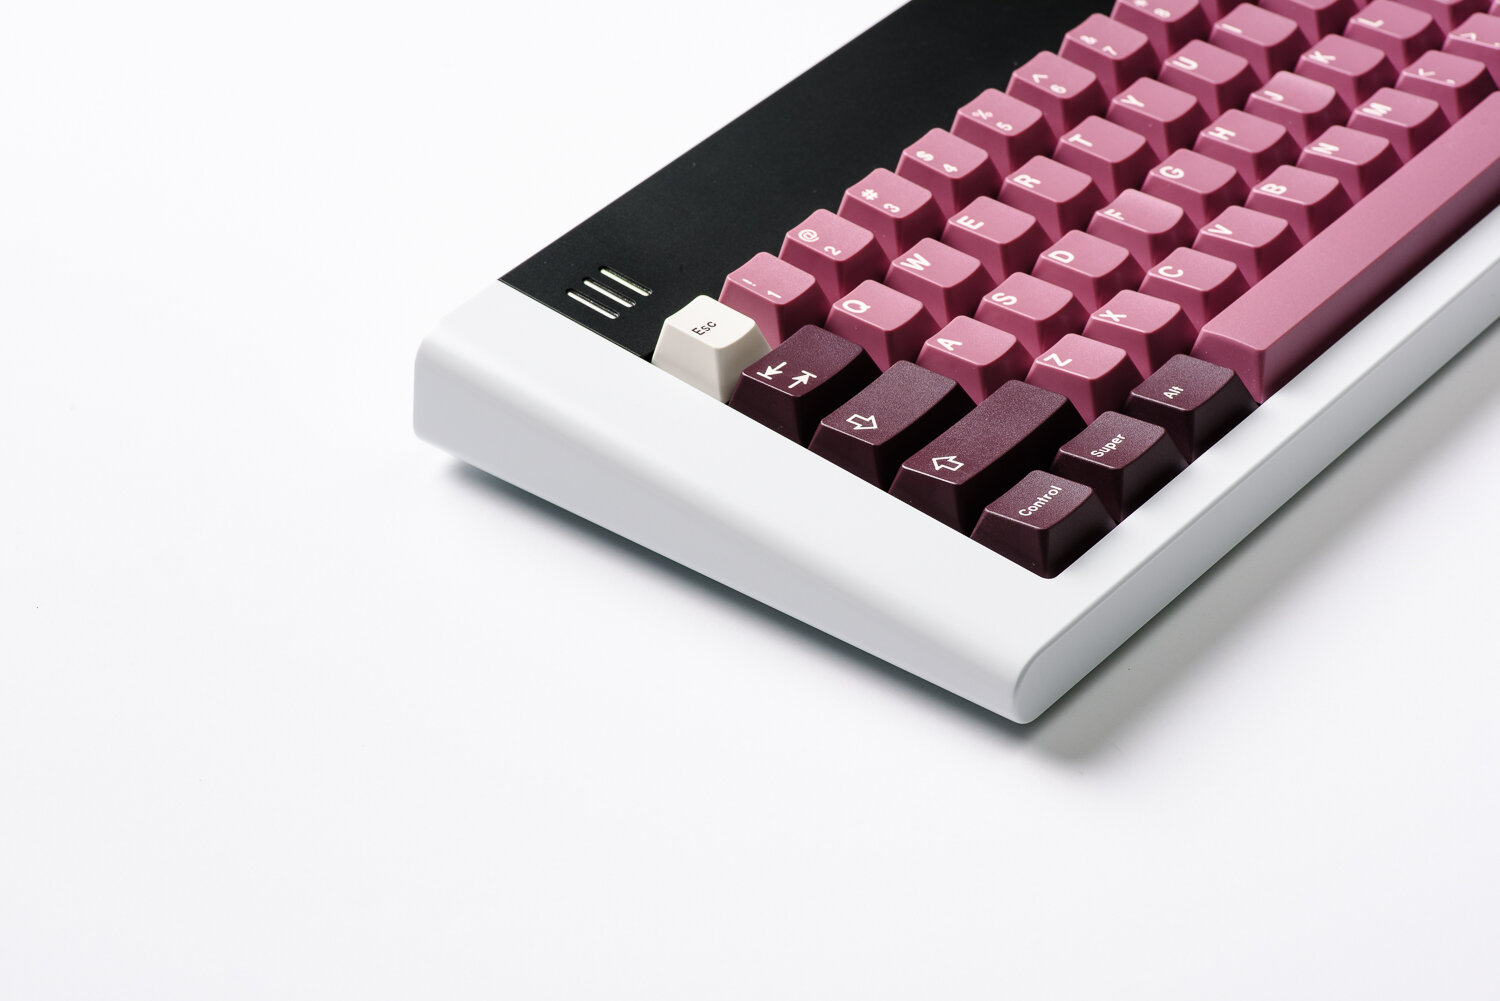
If you aren’t invested in the grid 650 for the modular element, you’re probably here for the rounded design. The left and right sides are aggressively filleted for the rounded sides slightly reminiscent of the iPod mini. Unlike the iPod mini, the sides are trapezoidal, tapering to allow for a 5.5-degree typing angle. Due to this graduated look, the front side of the keyboard takes on an extended oval shape, while the back is a rectangle with aggressively rounded radii. Both the front and back are perfectly flat and allow the keyboard to stand on its own (in case you were curious). Every edge you see is filleted, resulting in a very soft look.

Besides the rounded look, the bezels are also quite massive on the grid 650. The bottom bezel measures 10mm, each of the left and right sides measures 25mm, and the top bezel (aka the module) measures 37mm. This makes the footprint of the grid 650 somewhere between a 75% keyboard and a TKL, despite the 65% layout. Whether the design is worth the extra desk real estate utilized will be up to you. The combination of the rounded edges and large side bezels does make the keyboard very easy to pick up and move around your desk. The bezels are also nicely raised above the bottom of the keycaps so there is no switch visibility. At the same time, there is enough lateral clearance to easily remove the keycaps and switches with a puller.

The back side of the keyboard features a portion machined out for the power switch, USB-C port, and single port USB type A hub. The lower placement of the port allows the cable to sit relatively low to the table, and the centered position is a nice touch. The USB-C port is only slightly recessed, but the overhang from the machined portion conceals most of the connector from your line of sight anyways. The front side of the keyboard features an indicator LED on the right side (caps lock indicator for the wired PCB, Bluetooth indicator for BLE PCB). There is a piece of diffusion plastic in the window that keeps the light reasonably soft from a normal typing angle.

The bottom case, despite being thin, gives the keyboard a slight bit of extra height to achieve a slight floating effect and make it very comfortable to lift the keyboard. The actual underside of the keyboard is a bit industrial-looking with the eight M3 screws. It would’ve been nice to see the bottom surface uninterrupted by screws, but I’m not too bothered, since this is the bottom after all. I do like that the bottom case sits well within the edges of the top case and features an aggressive chamfer to form the transition between the two parts. The four raised strip feet come in white on all models, which is a nice detail if you opt for the e-white case. There’s also a centered grid logo debossed into the top edge and a small clear plastic window for the Bluetooth module along the bottom edge.
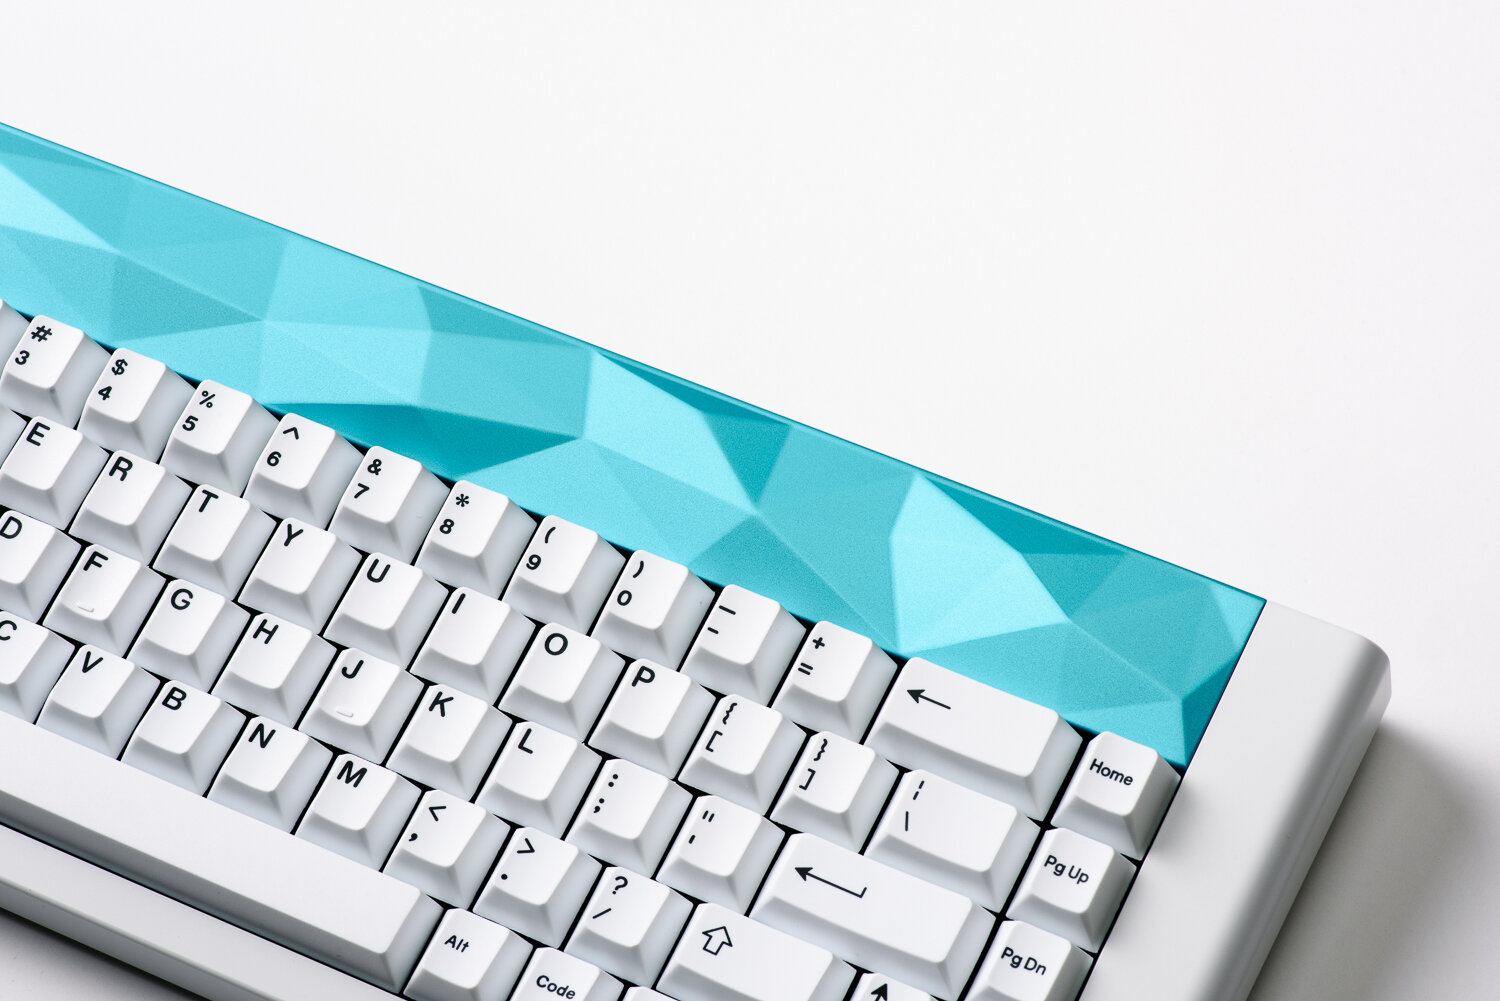
The grid 650 has a fair amount of visual appeal in a world dominated by keyboards with sharp edges and hard lines. The keyboard is available in e-white, black, or navy. The modules are available in black, navy, purple, teal, maroon, rose, and silver. I think the best looking configuration is an e-white chassis with a black module, but it will be interesting to see what other setups emerge once units ship.
Build Quality
The e-white finish is nicely executed with an incredibly smooth texture and a slight sheen to the surface. There is no coarseness whatsoever, unlike other e-white finishes I’ve experienced so far. The shade of white is fairly bright but takes on a slightly grey look under certain lighting (it’s somewhere between WS2 and WS1 in terms of GMK colors). The match in color between the top and bottom case is fairly close if not exact. The anodization on the black neon module is a little rougher but there are no notable deformities in the surface. I also have no complaints about the anodization on the 4mm aluminum plate.
The machining of the case is pretty complex with all of the filleted areas. If I were to nitpick, I would point out that the bottom of the slant on both sides is not perfectly rounded, with a slightly flat surface visible in the center of the curve. I’m not sure if this was a technical limitation in machining or an oversight otherwise. You can really only notice it if you run your fingers along the sides of the case or if a light casts a shadow on the sides of the keyboards. I have a feeling most people won’t be looking closely enough to notice this, but I found it to be a bit distracting among the otherwise clean lines.
The top module lines up reasonably well with the rest of the case, but it’s definitely not perfect if you look closely or run your fingers along the seams. The area where the module joins the face of the keyboard is relatively seamless, but the edges along the back of the keyboard are a bit more noticeable. Alignment tabs for the module would’ve been a nice touch to help things line up more consistently.

The power switch slider is a machined metal piece rather than plastic, so it looks quite a bit nicer and well-integrated than an off-the-shelf part. However, the actual feeling when sliding the switch on and off feels a bit mushy and loose. It would’ve been much more satisfying if it notched more securely between the two positions.
The switch cutouts in the 4mm plate are well machined, with no movement in the north/south axis and minimal play in the east/west axis. Once connected to the PCB, everything is completely stable, however. In fact, the switches sit so flush to the thick plate that I found it slightly difficult to get a grasp on the switch tabs when hot swapping switches.
All of the mounting hardware feels high-quality, and the usage of hex socket screws over Phillips ones is greatly appreciated for the sake of longevity.

Typing Feel and Sound
Okay, so you’re probably wondering about how the hybrid mounting system affects typing feel and sound. After all, what’s the point of additional build complexity if it doesn’t benefit the typing experience?
Let’s start with feel - the typing experience on the grid 650 is very firm, regardless of whether you build it with a plate and gaskets or plateless. There are a couple of reasons for this - the sheer number of mounting points, the method of mounting, the firmness of the flexible material, and the size of the flex cuts in the PCB.

In terms of contributing to bottom-out softness, the “gasket-mounting” does not do a whole lot. The silicone covers for the plate tabs feature small bumps on them. When I measured the potential compression of these bumps using a set of calipers, I found it to be less than 0.5mm. The grid 650 actually comes with two sets of silicone covers, clear being the softer variant and purple being the harder variant. I did not even bother trying the harder variant given the low amount of compression offered by the softer covers. The way the metal brackets secure the plate to the top case with low compression essentially reverts the design to a sort of top-mount.
The second component involves the inclusion of side mounting points. Side mounting points are generally not recommended in keyboard design because they tend to transfer more vibrations than top and bottom mounting points. I thought I’d troubleshoot here by taking the side burger mounts out and just building using the three top brackets and the pressure from the bottom case on the bottom three tabs. Even with the exclusion of the side mounting points, things still felt very firm.
From here, I moved on to the plateless build in hopes that things would be a bit more flexible. When mounting the PCB to the top case, I skipped the two side mounting points, opting to just use the top four screws and bottom four screws. This seemed to help make the bottom-out a tad less stiff. However, the flex cuts in the PCB were simply too small and did not allow for any flex, even when pressing down firmly on the PCB. I spoke with the designer of the keyboard about this; he mentioned that they did prototype with larger flex cuts, but he was concerned with the durability of the PCB.
The other factor I considered is that the Poron foam in the bottom case presses up against the bottom of the PCB quite firmly, leaving some imprints in the foam when you pull the keyboard apart. I tried removing all of the foam to give the PCB some room to move, but this still didn’t make much of an improvement feel-wise.
Now, firmness isn’t necessarily a terrible thing, and not everyone is looking for a soft or flexible bottom-out experience. However, it is worth noting that the grid 650 won’t be as versatile in terms of customizing typing feel as one might assume given the configurable mounting style. Things are going to be relatively firm regardless of how you build it out.
Let’s move onto sound. The grid 650 has a fairly deep “thocky” sound overall, especially with the 4mm aluminum plate. The alphas all sound very consistent, with a noticeably deeper sound in the number row. By going with a plateless build, the sound signature becomes slightly more open (while still relatively deep). On the other hand, removing the Poron layers in the bottom case makes the keyboard sound a bit hollow. The slight letdown in the sound department would have to be the spacebar. While not entirely a dealbreaker, the spacebar sounds high-pitched and metallic compared to the rest of the keys. My theory is that this is the result of vibrations from the front edge of the case. Apart from this, typing sound on the grid 650 is fairly nice; it just doesn’t sound particularly exotic or “poppy” like many of the keyboards sought after for their sound profile. The inclusion of the Poron foam in the bottom case is definitely carrying the sound signature here, which is something that may divide enthusiasts.
The designer of the keyboard is currently working on a polycarbonate plate (announced after the group buy), but the complex design of the plate (with its side burger mounting tabs) will make it difficult for aftermarket plates in other materials such as FR4 to surface.
Overall, the internal design of the grid 650 feels exactly like what you would do if you set out to reduce metal-on-metal contact within a keyboard to reduce high-frequency sounds. That said, I believe most of the deep sound here can be attributed to the design of the case and the inclusion of Poron foam, rather than the intricate mounting system (as evidenced by the plateless build which screws directly into the top case). I can’t help but feel that the complexity in the mounting system is done in vain. Neither the inclusion of the silicone gaskets nor the ability to build plateless actually enables a softer typing experience.

Layout and Programmability
The grid650 uses a standard 65% layout with no blockers and 6.25U spacebar by default. This works particularly well with the entire cluster of keys as a single unit amidst the large bezels. If you opt for the solderable PCB, you can implement split backspace, 6U spacebar, 7U spacebar, and ISO layout. There is also a WKL top available that will only work with the solderable PCB.
The wired PCB supports QMK and VIA natively. The BLE/wired PCB supports QMK natively but can partially support VIA as well (with limitations on certain Bluetooth-related keys). Unfortunately, I wasn’t able to get VIA working even after flashing the firmware for the wired PCB. Hopefully, this will be remedied before buyers receive their units. If you aren’t comfortable with doing any work in QMK, media controls are mapped to Fn + arrow keys by default(up/down for volume and left/right for previous/next).
Features
Modules - the grid 650’s raison d'etre. The full list of module options includes - 01 Classic (pen holder), 01S Classic-S (stainless steel pen holder), 02 Neon (glow in the dark tritium vials), 03 Peaks (machined 3D design), 04 Flash (RGB strip), 05 Press (four additional keys), 06 Wave (machined 3D design), 07 Array (retro LED display), 08 Linears (machined 3D design), 09 Stand (phone stand), and 10 Circle (knob).
The 04 Flash and 07 Array appeared to be very popular given the inclusion of additional electronics. However, I wasn’t interested in having a light bar constantly shine in my eyes while typing, nor did I feel I would get much usage out of a single line of scrolling text. In pursuit of a simpler visual accent, I opted for a black 02 Neon module and a teal 03 Peaks module.

The Neon module adds a bit more character over the plain Classic module, but the tritium vials do not glow as brightly as rendered. In most lighting conditions, they will simply look white. Even at night, the red, blue, green vials glow somewhat dimly. It would have been interesting to see these implemented using LEDs instead and potentially having indicator functionality (I passed on the 04 Flash module because I wasn’t interested in having a light bar constantly shine in my eyes while typing). The Peaks module adds a nice bit of visual intrigue to the board, although the teal color is a tad bit lighter than I would’ve preferred.
Changing out the modules requires undoing 12 screws, so I would guess that most people are primarily going to stick with one module past the initial experimentation with the functionality. Personally, I’ll likely be sticking to the Neon module despite the weak glow. Less is more, and it fits the best with the look of the keyboard for me.

Bluetooth is the grid 650’s other intriguing feature. In the custom keyboard world, Bluetooth is not common (in part due to the complexity in regulations when it comes to selling something with Bluetooth and batteries).
To power the Bluetooth module on the grid 650, you will need to purchase your own 18650 battery (a quick Google search will yield the fact that these are commonly used among flashlights and vapes). This is the part that makes the grid 650 feel like a homegrown custom project. Even though all of the visible exterior parts are pretty refined, the battery system feels like an off-the-shelf part you’d find in an RC car.
The Bluetooth connection process also feels a bit hacked together. There is no button to hold to enter a pairing mode, nor is there an elegant interface to switch between different devices. Bluetooth is simply always on when you turn the keyboard on, and you have to turn Bluetooth entirely off on your computer to allow the keyboard to connect to your other computer.
That said, when used on a single computer, the Bluetooth worked reasonably well. It connected quickly and inputs were received reliably. I was able to wake both my Mac and PC from sleep using the grid 650 wirelessly as well. There were only a few erratic instances in which a single key input registered repeatedly. Battery life is rated at about a month with a 3,000 mAh battery; I have been using the keyboard for a little over a month, and the battery is still going strong.
There is also a USB 2.0 Type-A port on the back of the keyboard. I’m sure some people will find this useful for a mouse dongle, but I don’t see myself using this for any sort of actual data transfer or charging a device.

Competition
Around the same time that the grid 650 group buy was being run, another keyboard with rounded sides happened to hit the market - the boop65 by Biip (known for designing GMK Dots, Bento, KAT Milkshake, etc). The boop65 uses a more traditional gasket-mount system that may potentially have better luck with providing a softer bottom-out (unproven until it ships and confirms this). However, it does not have Bluetooth capabilities or a modular element to it. Apart from the grid 650 and boop65, there aren’t too many keyboards with this rounded side design.
In terms of Bluetooth support in custom keyboards, there are also very few options - Percent Studio offers it in a few of their keyboards, as does the Cyberboard from Angrymiao and IKKI68 from Wuque Studios. All of these keyboards are quite different from the grid 650 in all manners, so it’s safe to say that the grid keyboard truly has its own set of unique value propositions.

Final Thoughts
Generally speaking, designers and manufacturers will add one or two standout features when introducing a new keyboard. They might choose to innovate on an integral element like the mounting system or to add a supplemental feature like a knob or a design flair. With the grid 650, the designers have gone out and implemented a whole laundry list of features not commonly found in other keyboards - the modular top piece, unibody construction, Bluetooth, and a variable mounting system.
And while the grid 650 has a lot of cool things going for it - as well as a good deal of attention and care paid to its design - certain aspects of it also feel overlooked. For instance, I don’t think the complex mounting system really yields anything in terms of sound and feel that couldn’t have been achieved by a more traditional mounting style.
For their next keyboard, I would like to see the designers revisit the mounting style, refine the Bluetooth integration, implement a quicker module swapping mechanism, and improve the spacebar sound.
All said and done, I do applaud the designers of the grid 650 for being as ambitious as they were with this project. Any and all innovations with custom mechanical keyboard design push the hobby forward, regardless of how well they are executed. I think buyers will enjoy the grid 650, as long a soft or flexible typing experience is not their biggest priority.