Norbauer & Co. Heavy Grail review

To devout fans of the HHKB, the Heavy Grail is a long-awaited, luxury metal housing to elevate their beloved keyboard to an “endgame” status. To everyone else, it is a $650-1450 keyboard that doesn’t even include the actual keyboard. Over the past two months, I have had the fortune of taking an early look at the Heavy Grail to answer the question — does it retain the magic of the HHKB?
Specs
Form factor — 60% HHKB layout
Switches — Topre electrostatic capacitive (not included)
Construction — top-mount with Poron gasket
Case — CNC aluminum with powdercoat finish or polished stainless steel
PCB — HHKB PCB (not included)
Plate — ABS resin with integrated slider housings
Pricing — $650–$1450 (depending on finish)
Availability — pre-order
Disclaimer — I received the Heavy Grail from Norbauer & Co. for review. I have no financial arrangement with them, and all opinions are my own. I used my personal HHKB Classic to build the Heavy Grail.

Introduction
If you’re reading this review, you probably already know who Ryan Norbauer is. For those who are new to the world of Topre, here is a quick refresher — Norbauer is the de facto authority on upgraded enclosures for Topre keyboards. While there is a plethora of designers and manufacturers of MX-style custom mechanical keyboards, Topre is sort of the black sheep of the keyboard enthusiast world. These keyboards provide a very unique tactile typing experience that has garnered them a cult following, but the proprietary nature of Topre means that all of the keyboards are mass-produced and come pre-assembled in plastic cases. Since 2016, Norbauer has been putting out luxury enclosures for Topre users who want a little more out of their keyboards:
Norbatouch (2016) — for Cooler Master Novatouch, Rapid-i, MasterKeys TKL
Norbaforce (2017) — for Realforce 87U
Heavy-6 (2018) — for Leopold FC660C
Norbaforce Mark II (2019) — for Realforce R2 / 87U
Heavy-9 (2020) — for Leopold FC980C
In June 2020, Norbauer announced the Heavy Grail, the long-awaited HHKB version of his custom housings. Although Norbauer himself is not an HHKB user, he took on this extensive project due to the sheer amount of requests from the community (and to take on the technical challenge). The pre-order opened in November 2020, and units are set to ship in late summer 2021.
Norbauer also took the care to support both Pro 2 and Pro 3 generations of the HHKB in distinct versions of the Heavy Grail. The Pro 3 enclosure supports the Hybrid, but your mileage may vary with its Bluetooth capabilities. For this review, I tore apart my HHKB Classic (Pro 3) to build the Heavy Grail.
Unboxing
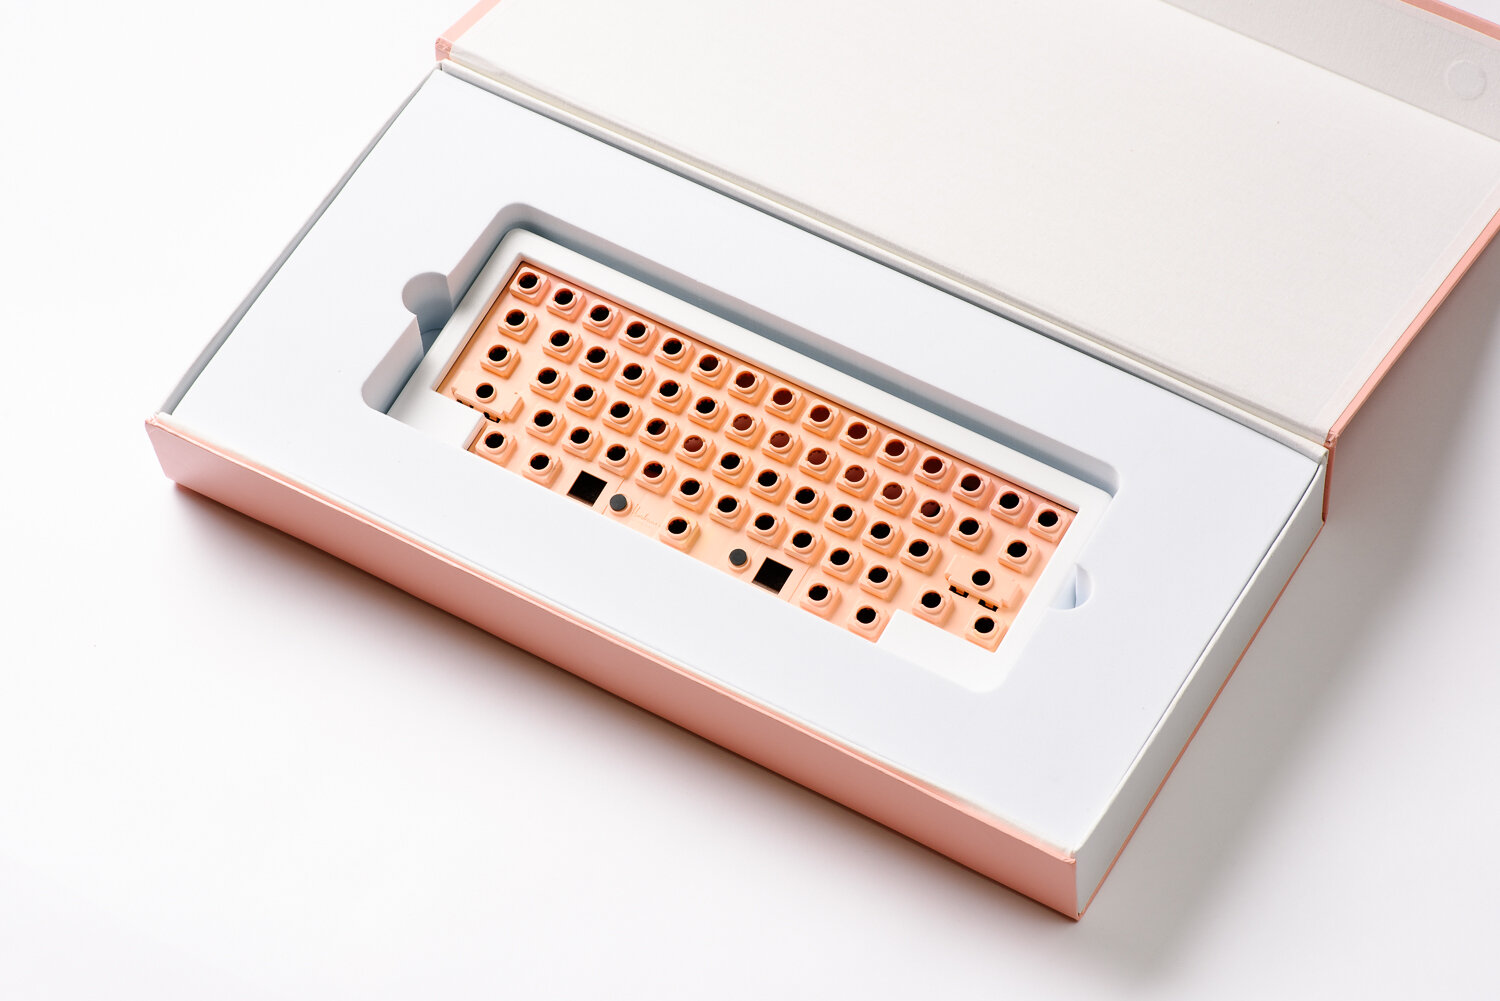
The Heavy Grail comes in a large pink box with a magnetic flap and linen lining on the sides. The keyboard itself fits snugly in a dense foam inlay, and resting atop the keyboard is a textured paper pouch containing a passport stamped and signed by Norbauer.
Generally, I’m not a proponent of packaging that can’t be reused somehow (my current preference is an included hardshell carrying case for the keyboard and durable pouches for parts). And although this big pink box is not the most efficient use of space, it makes for an appropriate home when the Heavy Grail is not in use — it’s reasonably durable and easy enough to access with its magnetic flap.
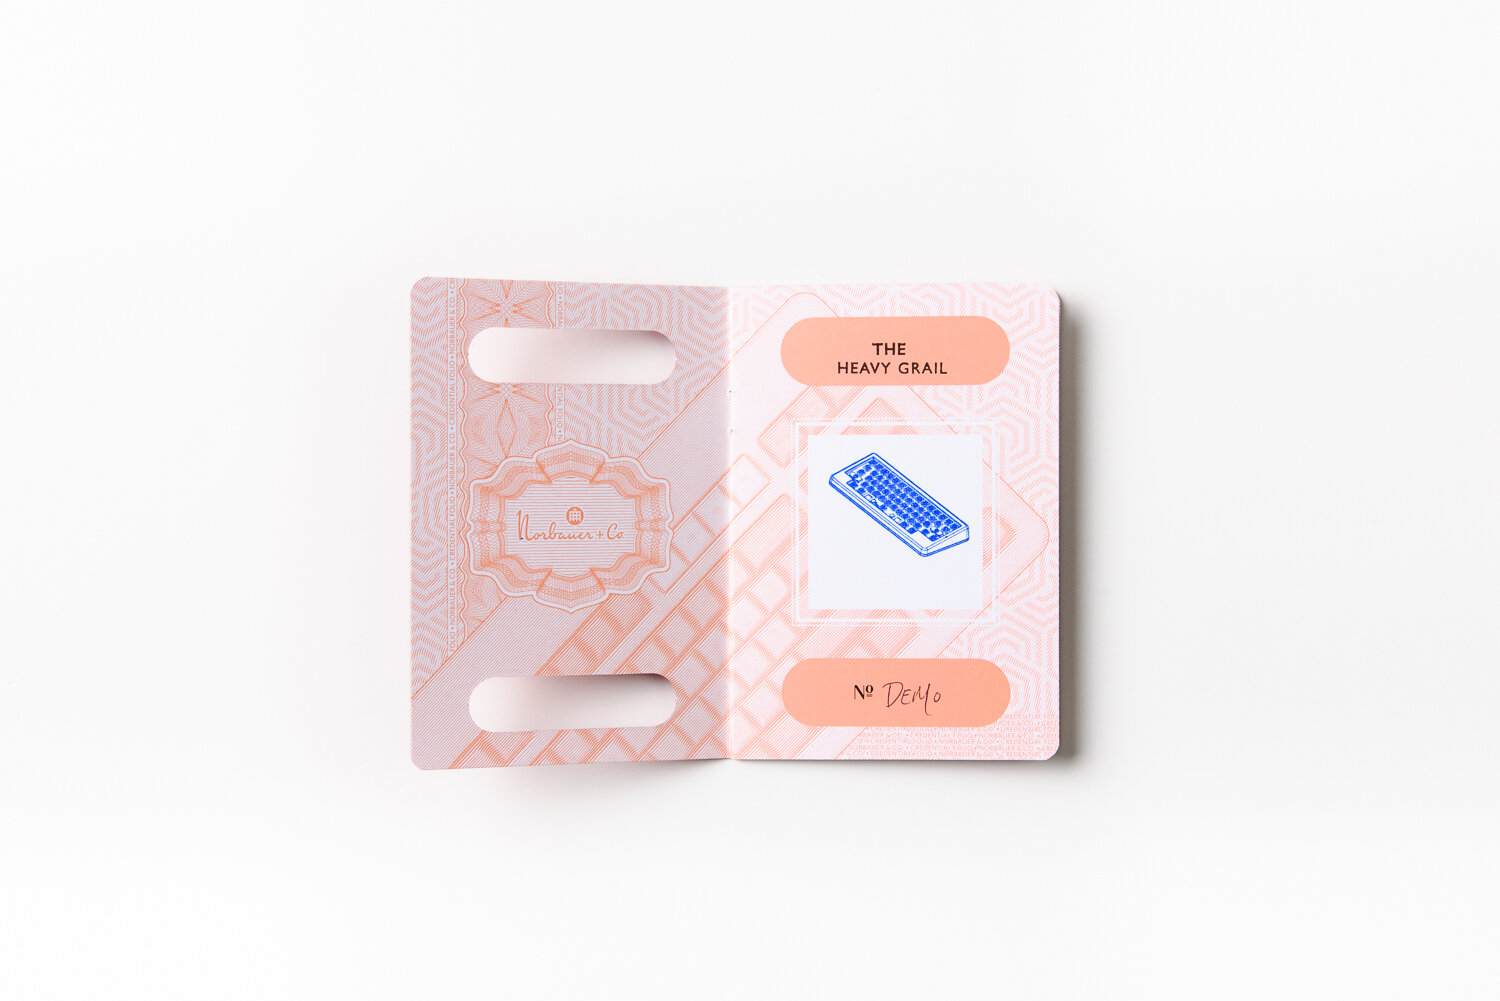
I really enjoy the small touches in nice packaging experiences, so the construction of the passport and the fantastic graphics stamped inside definitely struck a chord with me. Whether you’re a fan of the extravagance or not, you can’t deny that Norbauer knows how to make getting a new keyboard feel like an occasion.
The plate and rear cover come pre-installed to the housing, although you must bring your own hex key to put the keyboard together.
Edit (9/9/21) — Final retail units will ship with the plate separately and include a hex key/diamond file (please see the Build Quality section for more details).

Design and Construction
*At the very bottom of this page, I’ve included a lengthy epilogue with build notes detailing the HHKB disassembly and Heavy Grail assembly process.
The Heavy Grail is not a keyboard kit for the faint of heart, partially because it requires the disassembly of an existing keyboard. You must sacrifice an HHKB to harvest its keycaps, sliders, stabilizers, domes, springs, PCB, and daughterboard (essentially, everything is carried over except for the case and plate). So you might be wondering — if so much of the HHKB is carried over, what’s the big deal with the Heavy Grail, and why did it take so long to engineer?

The answer lies in the design of the stock HHKB top case and plate; the HHKB’s plate has to be one of the most overengineered and complex pieces of injection-molded plastic to be found in a consumer product. Each slider housing is molded directly into the plate, and the plate is integrated into the top case. In order to build around this design and to retain the characteristics of the HHKB as much as possible, Norbauer was tasked with creating an exact replica of this plate design. Through extensive development, he managed to do so both geometrically and in terms of the materials used. This is key, as HHKB loyalists often attribute its desirable typing characteristics to its unique architecture.

From there, it was a matter of combining it with the metal housing. For this, Norbauer opted to top-mount the plate to the case via 14 button head socket cap screws (five along the top edge, three along the bottom edge, two along each of the sides, and one at the corner of each corner blocker). Sandwiched between the top case and the entire perimeter of the plate is a Poron gasket; small Poron o-rings are also included to insert between the screws and the plate to further dampen any metal-to-plastic interface. The domes and conical springs are pressed against the plate by the PCB just as in a standard HHKB, and the PCB is screwed into the plate at the same positions as well (18 self-tapping Phillips screws from the HHKB). The daughterboard is held onto the rear cover via two hex screws that go on two metal posts on the rear cover. Due to the nature of how the daughterboard is screwed on, a bit of finesse is required to align it such that the USB port is not crooked. Neighboring the daughterboard is a merino wool felt dampener covering the majority of this bottom cover. Countersunk socket cap screws are used on the bottom cover to keep the screws flush with its surface. Along the perimeter of the bottom side of the top case are four recesses for the thick pill-shaped foam feet — two vertical ones on the right/left edges, and two horizontal ones along the bottom edge (they work well to keep the keyboard in place).

The Poron gasket measures 1.10mm in thickness and compresses down to around 0.5mm. I found that the smaller Poron o-rings were rather difficult to fit on due to how soft they are, but I’ll talk more about these in the typing sound and feel section of the review. Another minor gripe during assembly is that due to the seamless design of the sides of the case, there is no lip to gently place the bottom case into the top case. This — combined with the fact that the bottom case is quite heavy and flat — results in a brief moment of metal on metal grinding. It seems like a trivial complaint until you try to disassemble the Heavy Grail and once again there’s no lip to grab onto to remove the bottom case. You have to do a bit of maneuvering to flip the keyboard over and allow gravity to separate the pieces (which is slightly unsettling due to the daughterboard ribbon).

The Heavy Grail measures 17mm tall in the front, 34mm tall in the back, 320mm wide (tapering to 316mm in the front edge), and 130mm deep. Fully built, the keyboard weighs 3 lbs 4.3 oz (around three times the weight of the standard HHKB). This feels like a great weight range to be in for a metal 60% keyboard that you don’t plan to transport often.

Aesthetics and Details
The visual appearance of the Heavy Grail is strikingly different from most other custom keyboards that exist. The vertices are incredibly rounded and the edges are aggressively filleted as well. Rather than being comprised of a top and bottom case, the Heavy Grail also features a seamless unibody design with a rear cover plate.

The geometry of the Heavy Grail actually requires a special 5-axis mill to achieve. If you look closely, you’ll notice that the sides of the keyboard slope outward from the top edge to bottom edge and that the keyboard widens out toward the back. This gently flared-out design is very subtle and only visible if you look at the front of the keyboard straight on.
The Heavy Grail comes in four finishes - K2 (white, $650), Aperture (Leica-inspired hammertone, $650), Sunset (pink, $750), and Veracity (mirror-finish, $1390-1450). K2, Aperture, and Sunset are all powdercoated finishes on aluminum; Veracity is a hand-polished mirror finish on stainless steel.

I received the K2 finish, which has a slightly grainy texture to it. This type of finish is a welcome departure from the smooth fingerprint magnets that many keyboards tend to feature. However, I would’ve preferred a slightly finer grain texture to complement the soft lines of the keyboard. This is purely subjective, and I’m also not sure if this particle size might be a limitation inherent to the powdercoating process. My rationale is just that finer grain would make the surface feel a tad more premium and less reminiscent of the paint on a wall.

To rewind a bit, the first thing you actually notice when unboxing the Heavy Grail is the color of the plate — it’s a light pink hue that nicely complements the white case. The earlier prototype I received had a slightly more salmon-like hue whereas the final production version was more of a pure pink color. Norbauer says the color is supposed to be similar to that of the packaging and that mixes of plastics may vary from batch to batch.
Because of the sloping sides, the face of the keyboard actually measures quite a bit smaller at 312mm wide by 124mm deep. The bezels measure 13.5mm on the top, 15mm on the bottom, 12.5mm on the left, and 12.5mm on the right. The right blocker measures 160mm by 133.5mm, while the left blocker measures 141mm by 133.5mm. The area between the keycaps and the bezel is kept relatively slim to contribute to the seamless look.
The combination of the rounded look, the proportions, and the textured powdercoat gives the Heavy Grail a pebble-like appearance. It’s quite elegant overall, looking decidedly cozier in a workspace than the cold and angular tools that many keyboards are presented as.

The USB-C port lives inside of a recessed surround. If you use the cable that came with the HHKB, it will fill the surround perfectly. With other cables, you may see a small bit of the connector due to the amount that the port is recessed.
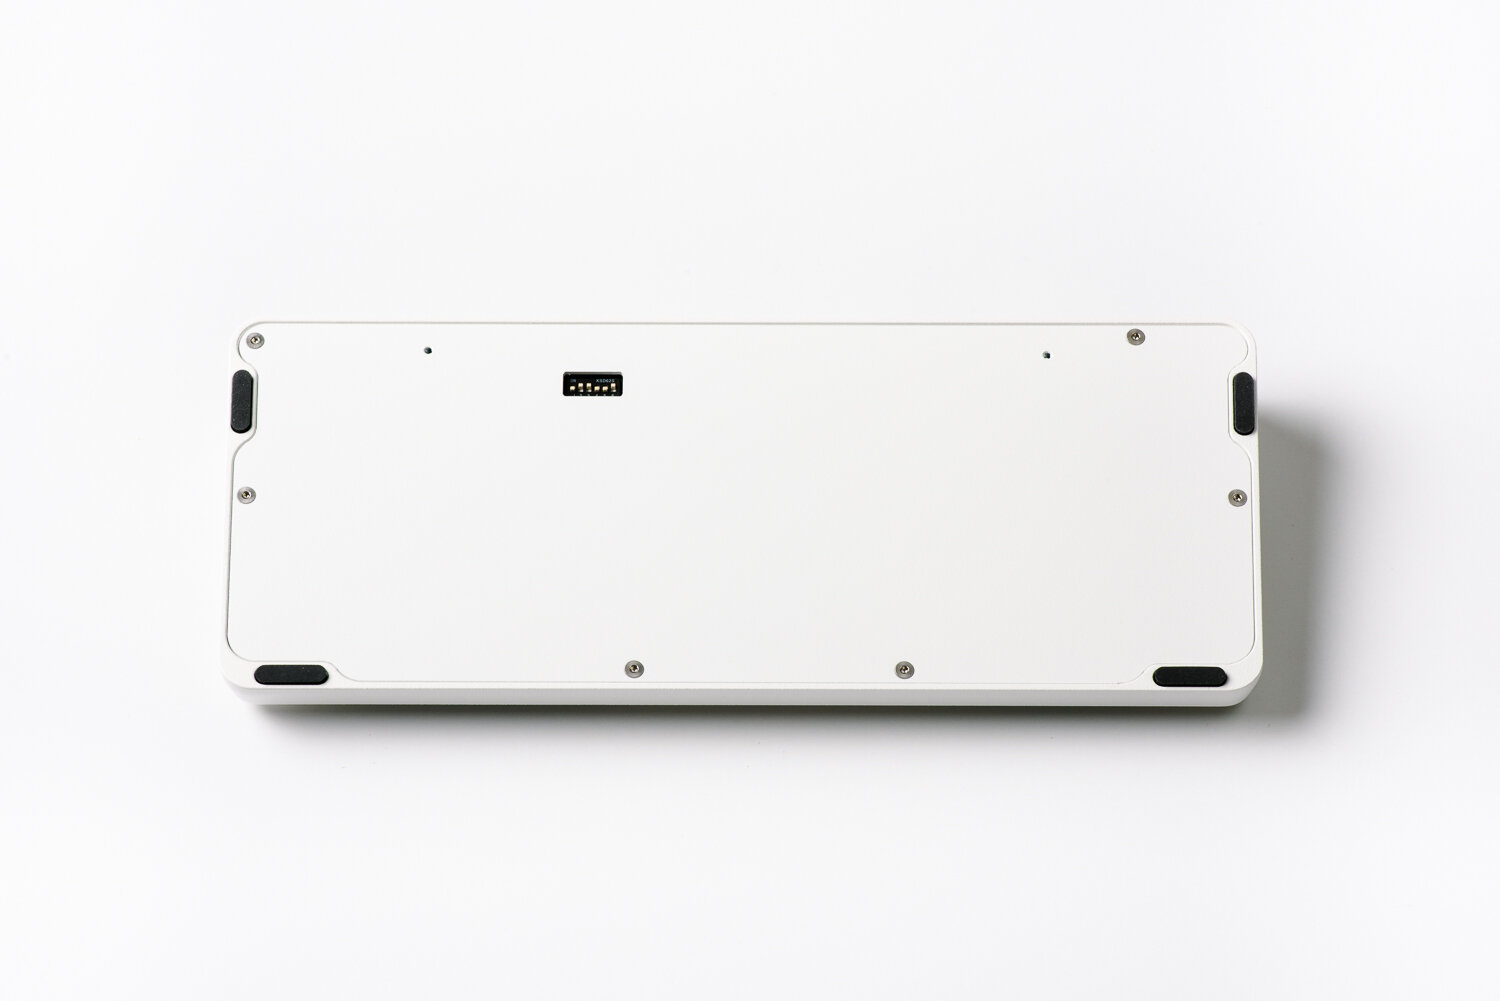
The underside of the keyboard is very minimal, with just a cutout for the DIP switches. The placement of the feet allows them to get very close to the edges of the case. My only gripe with this layout is that your fingers can dig into the vertical feet when lifting the keyboard from the sides.

Build Quality
The Heavy Grail is fully made in the USA, a decision partially attributed to better and more hands-on quality control.
The most notable build quality concern I had with the Heavy Grail was a bit of binding with the left shift key (on my unit). This cutout was a bit tight, causing the slider to return slowly. In the event of binding, Norbauer recommends a quick circular swipe with a piece of sandpaper or a jeweler’s file around the inner walls of the cutout. Every other cutout on both units fit the sliders and stabilizers perfectly, which is impressive considering the overall complexity of this plate.
Beyond this, the only other potential build issue I can think of is whether the powdercoat will wear away in the corners with extended time and usage (so far I have no concrete reason to actually doubt the powdercoat’s durability). The surface of the powdercoating doesn’t have any major imperfections, and its texture also does a good job of hiding any potential imperfections in the metal surface,

Typing Sound
The HHKB’s sound signature is responsible for one of the most pervasive words in the keyboard hobby — “thock” — due to its deep inherently deep sound signature. So how does the Heavy Grail compare to a standard HHKB in terms of acoustics?
For a fair comparison, I lubed the rails of the Heavy Grail with Tribosys 3204 and used the same unsilenced sliders and domes from my HHKB Classic (Pro 3). I also had an HHKB Pro 2 (lubed with Tribosys 3204 and silenced with Deskeys #2 rings) as an additional point of reference. I did consider testing the Heavy Grail in its factory state, but I figured there was a pretty low likelihood of an enthusiast investing in this kit and not taking the time to lube the slider rails while everything is torn apart.
The biggest difference in sound when switching from an ABS plastic case to an aluminum enclosure is that it is simultaneously more muted and higher pitched. Many of the low to mid-frequency sounds seem to be absorbed by the case, but the higher-frequency sounds are emphasized. For example, the downstroke is significantly quieter in the Heavy Grail, but the return of the slider/keycaps on the upstroke is quite prominent.

The overall volume of the keyboard with the aluminum enclosure is reduced almost as much as in an HHKB with silencing rings installed (although the silencing rings actually reduce the higher-frequency sounds of the upstroke instead). It is possible that the Poron gasket between the plate and top case is contributing to this more muted sound signature, but I didn’t bother to remove this piece so as not to negatively impact the typing feel.
If I had to compare the two, the HHKB in its plastic case is simply more resonant, producing a bassier and more “open” sound. With a standard HHKB, the downstroke seems to send sound through the case, and the upstroke is also dispersed throughout the case itself rather than back through the face of the keyboard. Over time, that “open” characteristic is something I’ve grown to enjoy.
As to the consistency of sound, there is quite a bit of variance across the board. The top row is significantly louder, as is the spacebar. There is also some variation as you approach the center of the board — the sound seems to change a bit around the S and D keys on the left side and K and L keys on the right side.
Both the Heavy Grail and standard HHKB feature a deep “thocky” sound that MX-based boards struggle to replicate. Neither sounds better or worse than the other, but the sound signatures are notably distinct. Which one do I personally like the acoustics of better? I think I still have to go with the HHKB. There is something about the resonance of the plastic case that just reminds me of raindrops. With that said, everyone perceives sound differently, so your experience may vary here. If you prefer a more muted sound signature, the Heavy Grail will actually better suit your tastes.

Typing Feel
In terms of typing feel, the Heavy Grail is notably stiffer than a standard HHKB. Despite Norbauer’s extensive efforts to replicate the plate perfectly, there is still a physical limitation of hard mounting points from the plastic plate to the metal case. In particular, the two columns of keys adjacent to the corner blockers felt significantly firmer compared to those in the center of the board. I also did not find the Poron o-rings that go between the screws and the plate to make a notable difference in softening the typing experience.
However, I was determined to see if I could make the Heavy Grail suit my typing preferences. I proceeded to try reducing the number of mounting points to make things less stiff. Keep in mind I did not have two full Heavy Grail builds side by side to A/B test, and the removal of plate screws obstructed by the PCB required disassembly of the PCB/dome portion (18 screws each time). I started by removing the two on the sides (side mounting points are often discouraged in MX-style boards as they can result in an overly stiff experience). This might’ve helped a bit, but the results didn’t feel significant enough. I quickly realized, however, that there were only so many screws I could remove without compromising the structural integrity of the assembly. Due to the location of screws around the HHKB corner blockers, the PCB/plate would sag in a disconcerting manner when these were removed. I forged ahead and still gave it a try. This did make certain areas less stiff, but the results weren’t the most consistent. I also felt a bit uncomfortable leaving the keyboard in this compromised configuration.
Now, I know a soft typing experience isn’t necessarily the end-all-be-all when it comes to keyboards. Some may even prefer the firmer typing experience of the Heavy Grail over the stock HHKB. Personally, my preference for the latter stems from the fact that stiff typing experiences can cause my fingertips to fatigue during long typing sessions (the vibrations seem to transfer back into the fingers rather than distributing themselves throughout the surface of the keyboard). Your mileage may definitely vary here, as I am most likely a fairly heavy typist.
The 8 degree typing angle of the Heavy Grail also feels notably steeper than that of the standard HHKB (at 6.91–7.45 degrees), especially with the top row. However, I wouldn’t say it is necessarily uncomfortable at all.

Competition
At the time of writing, the only other metal HHKBs are the limited edition HHKB HG from 2006 and the Noxary Evija from 2020.
The HHKB HG retailed for $4500 and was incredibly limited at 100 units to celebrate the 10th anniversary of the HHKB. It is often considered unobtainable, even at double the retail cost, due to its inherent collectibility.
The Evija was priced between $450-$840 for its three editions and was also incredibly limited at 60 units total (40 aluminum, 10 polycarb, 10 aluminum / stainless steel base). The largest drawback of the Evija is that it requires the sacrifice of not one, but two keyboards — an HHKB Pro 2 and a Realforce R1. It harvested the domes, PCB, and daughterboard from the HHKB, while implementing the Realforce’s sliders and slider housings into Noxary’s own steel plate.
It’s safe to say that neither of these is truly a competitor to the Heavy Grail due to the limited availability. However, a major boon of Norbauer’s design is that the Heavy Grail plate can technically be used in other custom enclosures for the HHKB down the line (even from other makers).

Final Thoughts
In the process of using the Heavy Grail, it occurred to me that maybe this isn’t for the most committed or diehard HHKB fan as you might assume. A true HHKB purist has accepted its utilitarian nature — cheap plastic build and all. The Heavy Grail is for someone who wants more than what PFU Fujitsu has to offer. It’s for the collector who already owns every generation of HHKB and wants to scratch the itch of “what if the HHKB had an endgame enclosure.” Or perhaps it’s for the keyboard enthusiast who wants to add an HHKB to the lineup but simply doesn’t want to own a cheap plastic keyboard.
Allow me to apply an obscure automotive metaphor to the situation — the standard HHKB is a VW Golf. The Heavy Grail is that 2007 concept car VW built by putting a W12 engine from a Bentley into a GTI. It’s a massive feat of engineering and a spectacle to behold, but it still doesn’t replace the Golf as a trusty daily driver — nor was it meant to.
The Heavy Grail is an exercise in excess, and in that sense, it has nailed its mark.
As to the future of Norbauer & Co, I eagerly await a complete keyboard Ryan Norbauer has the freedom to develop from start to finish, without the design constraints of an aftermarket housing for an existing product. Ryan’s attention to detail is evident, and it feels like his team is just getting warmed up.
Epilogue — Assembly Notes
Beyond detailing the construction of the Heavy Grail, I thought it would be helpful to include some assembly notes in my review for potential buyers and other owners to reference.
If you’ve taken apart an HHKB before to lube/silence it, assembling the Heavy Grail will be significantly less daunting. Most of the process is the same, apart from transferring over the daughterboard and stabilizers. If you have never voided the warranty of your HHKB, you’re going to want to mentally prepare yourself and set aside some time to get this done right. I would recommend scrubbing through Taeha Types’ stream, Lightning Keyboards’ stream, or Man of Interests’ video to get familiar with the disassembly process and best practices.
If you can’t be bothered to do that, here’s a SparkNotes version:
HHKB disassembly — 1) Remove the keycaps. 2) Undo the three case screws. 3) Carefully remove the very fragile daughterboard ribbon from the PCB end (flip open the latch and gently pull the connector out) and set aside the bottom case for now. 4) Undo the 18 Phillips screws securing the PCB to the HHKB top case (as you release the last couple of screws, apply firm pressure to the PCB to keep the dome assembly intact). 5) Flip the HHKB top assembly over while supporting the PCB and lift the top case away (again, be very careful not the knock the domes and springs off of the PCB — they’re not held in by anything); set the PCB/dome assembly aside where it won’t get bumped. 6) Pop the sliders out of the top case/plate. 7) Pop the stabilizers off of the plate (the spacebar stab is a pain that requires some finesse).
Heavy Grail assembly — 1) Transfer the daughterboard over from the bottom case of the HHKB to the bottom case of the Heavy Grail (3 Phillips screws off of the HHKB, 2 hex heads on to the Heavy Grail). 2) Before installing the sliders, you’ll most likely want to lube the slider rails of the Heavy Grail (not mandatory, but it’s worth doing these and the stabilizers while you have everything torn asunder). 3) Install the stabilizers from earlier onto the plate. If you’re installing silencing rings, dome swapping, using aftermarket sliders, lubing the PCB, this is also where’d you’d do your thing. 4) If not, with the sliders installed, hold the top case with the underside facing downwards and carefully align the PCB/dome assembly onto the underside. (If you accidentally knock the domes and springs off of the PCB at any point, you’ll need to individually install the domes and springs onto the plate facing down and then align the PCB itself). 5) At this point, you’ll need to flip the assembly over and gently rest the two side bezels of the top case onto two objects around the same height (you can use two rolls of tape, two portable hard drives, etc). This will ensure that the sliders don’t provide upward pressure into the PCB while you try to reinstall the 18 screws. 6) Once that’s on, the hard part is over — hold the bottom cover in one hand, carefully plug in the ribbon cable into the PCB, and screw the case shut. 7) Install keycaps.